- IaC for vRealize: Deploying vRealize Build Tools To Allow Infrastructure As Code for vRA and vRO
- IaC for vRealize: Manage Existing vRO Code With vRealize Build Tools & Set up Git Repositories
- IaC for vRealize: Define Dependencies, Manage Versions, Prepare & Release Packages & Deploy Artifacts
- IaC for vRealize: Documenting Code with JSDoc and Syntax Checking and Code Style Management with ESLint
- IaC for vRealize: Updating Archetypes and Adding Boilerplate For Your vRO Actions
Welcome to the 5th post in the series. This is going to be a relatively small post where we will take a look at archetypes and how to update these and also discuss a standard layout for creating vRO Actions. At this stage, the focus is on ensuring that we have everything required when creating new projects, instead of having to add new files to the project or modify existing ones.
Page Contents
Archetype
By now you have come across the term ‘archetype‘ when working with Maven. If you’re not a Java developer or ever worked with Maven before, then you likely have no idea what this means in the context of creating projects.
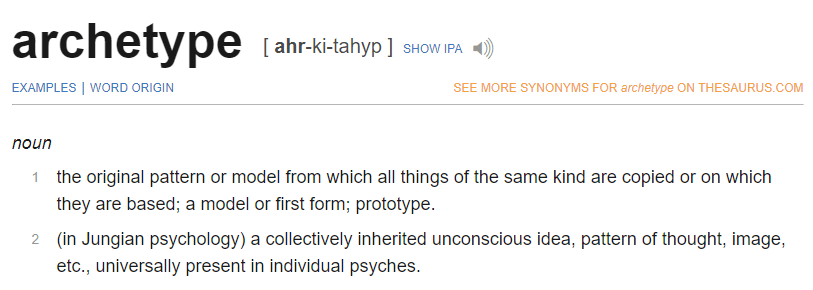
Here is a dictionary definition for archetype:
So if we look at the first definition, we can think of a Maven archetype as a model for our projects. In essence, think of an archetype as a ‘template’ for Maven projects.
Notice what happens when we create a project for the first time, we would execute a command similar to this:
mvn archetype:generate -DinteractiveMode=false -DarchetypeGroupId=com.vmware.pscoe.o11n.archetypes -DarchetypeArtifactId=package-actions-archetype -DarchetypeVersion=1.5.11 -DgroupId=com.simplygeek.library -DartifactId=nsx
We specify ‘archetype:generate‘, which tells Maven that the project should be generated from an existing archetype. We also specify ‘archetypeGroupId‘, ‘archetypeArtifactId‘, and ‘archetypeVersion‘, which tells Maven how to find the archetype.
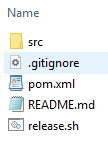
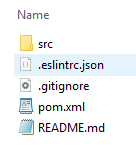
Once we have executed the above command, Maven will download several artefacts that it requires for the project. Once this task completes, you will have a directory structure that looks something like the following (depending on what type of project you are creating):
The ‘src‘ directory also includes a ‘main‘ and ‘test‘ subdirectory that includes a sample Action and unit test.
This directory structure and the files have been predefined inside of an archetype. When a new project is created, Maven downloads this archetype and unpacks the contents to form the project directory. This means that every project that we create will look the same.
But what if we want to change this, or perhaps add additional files or update existing ones? Well, it’s quite easy, we just have to locate the artefact for the archetype and update it.
Update Existing Archetype
If you think back to the very first post, we downloaded the vRealize Build Tools package from the VMware flings website. From within this package, there was an ‘iac-maven-repository.zip‘ file, which we copied to a CI server (I used the Artifactory server in my first post). This file includes all the archetypes that are used for our projects.
Depending on which project type you create, the following archetypes are available:
- iac-maven-repository/com/vmware/pscoe/o11n/archetypes/package-actions-archetype
- iac-maven-repository/com/vmware/pscoe/o11n/archetypes/package-mixed-archetype
- iac-maven-repository/com/vmware/pscoe/o11n/archetypes/package-vrealize-archetype
- iac-maven-repository/com/vmware/pscoe/o11n/archetypes/package-xml-archetype
- iac-maven-repository/com/vmware/pscoe/vra/archetypes/package-vra-archetype
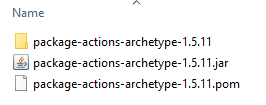
Inside each of these directories, there is a ‘<version>/<archetype>-<version>.jar‘ file and an associated pom file. For a JS based project, you will see:
The jar file is just a zip file and can be opened with any zip software. When you open this file (I’m using 7Zip on WIndows) then you will see two folders, ‘META-INF‘ and ‘archetype-resources‘.
If you navigate into ‘archetype-resources‘, you will see the same folder structure that you get when creating a new project.
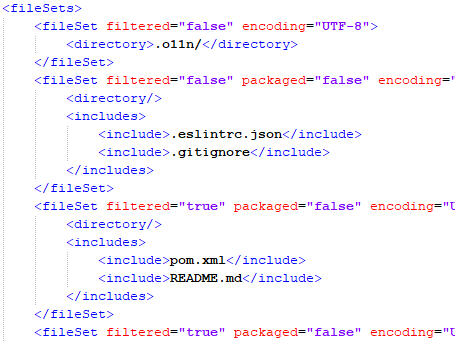
So all that you need to do, is add, remove or modify files in this location, which will then be used for all future projects that you create that are based on the archetype. The easiest way to do this would be to extract the ‘jar‘ files contents to a folder of the same name and then make the changes. Below you can see the folder that contains the extracted content of the jar file.
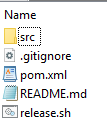
You will also need to update the decrypter for these files is in the ‘META-INF\Maven‘ folder. You will need to edit the ‘archetype-metadata.xml‘ file accordingly. In my environment, I have removed the ‘release.sh‘ file, added ‘.eslintrc.json‘ and updated the existing ‘.gitignore‘ file.
Once you have made your changes, you need to repackage the jar file. Simply create a new zip file of the folder and change the extension to ‘.jar‘ (you will need to remove the existing jar file first).
You will now need to re-upload the artefacts to the virtual repository in Artifactory. If you recall in my first post, that we prepared and uploaded the vRealize artefacts, which you can take a look at here to refresh your memory. In that post, we staged the artefacts inside a local folder on the Artifactory server and then uploaded them using the Jfrog CLI.
I am making the changes to these archetype files on my desktop, which I will then copy (using WinSCP/SSH) to the local ‘vrealize_artifacts‘ folder on the Artifactory server and then re-upload them again using the Jfrog CLI.
Your local workstation (or wherever you run the Maven commands) also keeps a cached copy of any artefacts that have been downloaded from Artifactory in your ‘home_directory/.m2/repository‘ folder. Therefore, we have to remove these so that the updated ones are re-downloaded when we create a new project.
Remove the following folders:
- .m2\repository\com\vmware\pscoe\o11n\archetypes
- .m2\repository\com\vmware\pscoe\vra\archetypes
The next time you create a new project, the updated archetypes will be downloaded.
And the new project will look like the updated archetype:
If you don’t get the expected result, then go back through the steps above and see if something was missed.
Adding Boilerplate For Actions
This section is an extension to a post I wrote quite a while ago on vRealize Orchestrator: Standardising Modules & Actions, where I discussed strategies on managing your vRO repository and a default template (boilerplate) to use for creating Actions.
I have slightly updated this template to make it suitable for Maven projects.
/**
 * This is an Action template that can be used as a starting point for creating
 * new Actions in vRealize Orchestrator.
 * @author Gavin Stephens <gavin.stephens@simplygeek.co.uk>
 * @function actionName
 * @param {data_type} param1 - param1 description.
 * @param {data_type} param2 - param2 description.
 * @param {data_type} param3 - param3 description.
 * @returns {void} return description.
 */
(function (param1, param2, param3) {
    /**
     * Checks that mandatory parameters have been satisfied.
     * @param {data_type} param_1 - param1 description.
     * @param {data_type} param_2 - param2 description.
     * @param {data_type} param_3 - param3 description.
     */
    function checkParams(param_1, param_2, param_3) {
        var inputErrors = [];
        var errorMessage;

        if (!param_1 || typeof param_1 !== "string") {
            inputErrors.push(" - param_1 missing or not of type 'string'");
        }
        if (!param_2 || typeof param_2 !== "number") {
            inputErrors.push(" - param_2 missing or not of type 'number'");
        }
        if (!param_3 || !(param_3 instanceof Properties)) {
            inputErrors.push(" - param_3 missing or not of type 'Properties'");
        }
        if (inputErrors.length > 0) {
            errorMessage = "Mandatory parameters not satisfied:\n" + inputErrors.join("\n");
            log.error(errorMessage);
        }
    }

    var logType = "Action";
    var logName = "actionName"; // This must be set to the name of the action
    var Logger = System.getModule("com.simplygeek.library.util").logger(logType, logName);
    var log = new Logger(logType, logName);
    var itemToReturn;

    try {
        checkParams(param1, param2, param3);
        log.log("start message.");
        // code
        log.log("end message.");
    } catch (e) {
        log.error("error message.",e);
    }

    return itemToReturn;

});
I have replaced the ‘sample.js‘ provided in the archetypes with my code above. This means that I always have my code available when creating a new project.
You don’t have to use my template, or may even have your own, but it’s just another example of why modifying the archetypes is useful. Just follow the same process to update and upload the archetype.
That’s it for this post. Hopefully, updating the archetypes can help you remove any repetition when creating new projects. If you are having difficulty updating these then please feel free to contact me either in the comments or via the Drift App.
